Isometric & Orthographic : AutoCAD
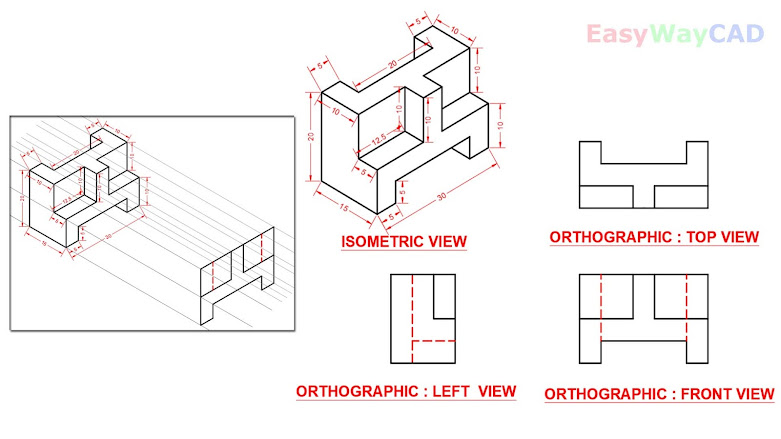
In Below Image, We can see the object's Isometric View & Orthographic ( Top, Front, Side) or ( Plan, Elevation, Side ) views. Orthographic is also known as Orthogonal Projection or Parallel Projection. It is two dimensional View.
I hope You Like this Post. Subscribe this blog so you can get regular updates about this blog! If you have any doubt you can comment, we will reply to you as soon as possible.you can share this post with your friends, relative & Colleagues.
In the next post, we will continue to about AutoCAD Commands.
- Bhargav Joshi
Follow, Subscribe, Share & Like Page:
Email us: easywaycad@gmail.com for any query.


Comments
Post a Comment
More Information Contact US on email.